Created: 10/30/2023
Bad News: It's Terminal
Companion Repo
You can clone a companion repo to follow along with the challenges!
Intro
This is an interactive lesson all about the Unix shell! This will be useful to
anyone developing in a Unix-like environment, including Linux, macOS, or Windows
Subsystem for Linux (WSL). This is not an introductory lesson. Rather, we assume
some prerequisite knowledge of basic shell commands like pwd, cd, ls,
mv, cp, cat, etc.
This is also not a guide about configuring a terminal emulator, multiplexer, or any other shell-adjacent tooling, though it's essential that you have a setup that brings you joy. My own terminal setup is available on GitHub. I use macOS, the Alacritty terminal emulator, tmux, and oh-my-zsh.
Instead, this is a shell adventure which strives to reveal some important big ideas about the shell:
- tools you think you know might do more than you expect
- the shell is a programming environment for composition
- lines of text as a primitive is a really great programming model
- ad-hoc regex is awesome, much more awesome than hard-coded ones in software
A Bit of History
Here, we see a 1930's teletype interoperating with a modern Linux machine. The modern shell environment that we know today started at Bell Labs in the 1970's. By the end of the decade, everything we'll explore today and much more was created. Concepts in modern computing which originated in this time are numerous:
STDIN,STDOUT, andSTDERRshlanguage, and laterbash- lines of text as a programming primitive
- the
Cprogramming language - in addition to
bashbuild-ins, many CLI programs:awkbg&fgcatcp,mv,lnechofindgrepmakeps,killsedtouchvi
Question: What does the -t argument to docker run do?
View Answer
-t stands for "allocate a pseudo-TTY," where "TTY" is an abbreviation for
teletype writer! Even in modern Linux, each terminal is an I/O device mounted at
/dev/tty1, /dev/tty2, etc.
In fact, you can use the tty command to identify the TTY device of your
current terminal. If you run echo "hello, world!" > $(tty), it will print
"hello world," but not because you ran the echo command (at least not
directly). The text printed in your terminal because the bytes "hello, world!"
were written into that input device, which is your terminal, which causes the
bytes to come out of your terminal. Anytime a program prints to STDOUT, your
operating system takes those bytes and writes them into a TTY device, ultimately
causing them to pop out of your terminal emulator!
That's also why "terminal emulators" have that name. They are not real physical I/O devices, they're just applications which emulate the physical device.
Challenges
Well, I hope I've piqued your interest and you're ready to learn some shell tricks. Let's get started with some challenges from the companion repo!
Needles in a Haystack: Easy
First, run ./create_haystack in the companion repo.
Challenge: find the needle in the haystack using the shell! The needle is in a
file named needle1.txt
View Answer
find haystack | grep needle
Needles in a Haystack: Medium
Find needles in the haystack using only find.
View Answer
find haystack/**/needle*.txt
Big Idea
You can do all this in VS Code (so far). But don't worry, we're just getting warmed up!
Remove the Needles
Ah man, all these needles, this is unsafe!
Run ./create_haystack 10 to put ten needles into the haystack.
Run mkdir biohazard to create a place for all this waste.
Challenge: move all the needles into the biohazard folder.
View Hint
man find | colcrt | grep -A 5 '\-exec'
hopefully it's clear, but this itself is not a hint, run this in your terminal to get the hints
View Answer
./create_haystack 10
mkdir biohazard
find  haystack/**/needle*.txt -exec mv {} biohazard \;
Big Idea
Tools you think you know often do more than you expect.
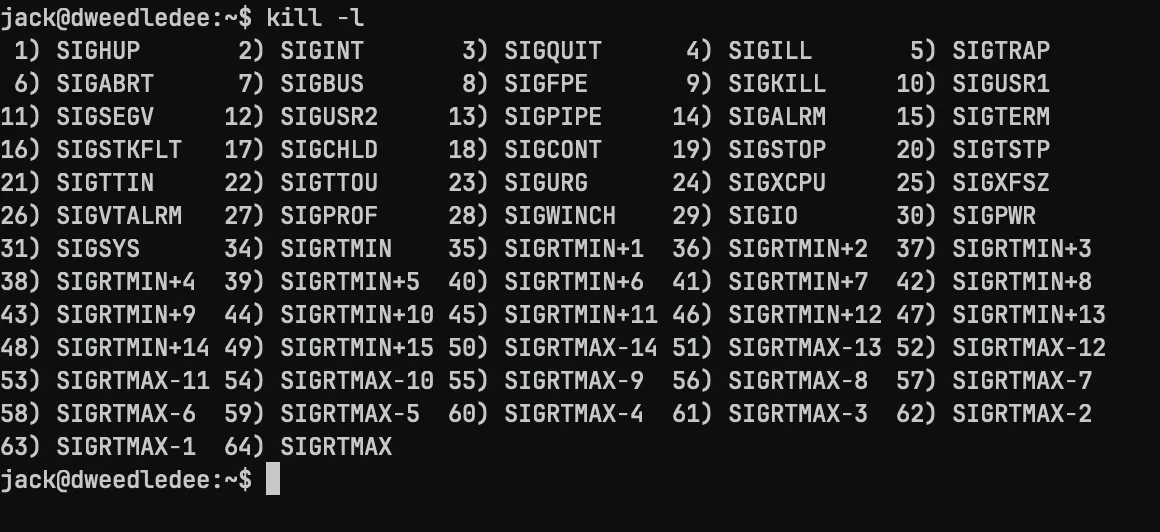
Defuse
Run ./kaboom.
Challenge: recover control of your shell without closing it! Find the lingering processes and kill them with your shell.
View Hint
You will need to open a new shell first :)
View Another Hint
You should use ps aux to list all processes running on your machine, which
will include several entries that say node program.js. These are the misbehaving processes.
Gimme another hint
You can pass the process ID to kill to make it go bye bye. The PID is the second column in the output of ps aux.
View Answer
ps aux | grep program.js | grep -v grep | awk '{ print $2 }' | xargs kill
Big Idea
The shell is a compositional programming environment.
Also, what the heck is awk { print $2 }? That was handy!
Awk Counter
Challenge: Use awk to parse a count of successful logins and successful logouts for each
user in ./some_app.log.
Working towards this, we can do a simple awk counter example together, to just count
the number of each letter in this file:
awk 'BEGIN { count = 0 }
     {
        for (i=1; i<=length; i++) {
            char = substr($0, i, 1)
            # Check if the character is a letter
            if (char ~ /[a-zA-Z]/) {
                count++
            }
        }
     }
     END { print "Number of letters in the file: " count }' some_app.log
Extending this, awk has a feature called associative arrays. Associative
arrays are created in awk implicitly using this syntax:
arrayname[string]=value
We do not need to declare associative arrays. This makes it super easy build up collections or aggregations, and do things like counting! Here, we have a program to return a count of each letter in the file instead of the total letters:
awk '{
    # Iterate through each character in the line
    for (i=1; i<=length; i++) {
        char = substr($0, i, 1)
        # Check if the character is a letter
        if (char ~ /[a-zA-Z]/) {
            # If the letter is already in the array, increment its count
            if (char in letterCount) {
                letterCount[char]++
            } else {
                # If the letter is not in the array, add it with a count of 1
                letterCount[char] = 1
            }
        }
    }
}
# END block is executed after processing all lines
END {
    # Iterate through the associative array and print letter counts
    for (letter in letterCount) {
        print "Letter: " letter ", Count: " letterCount[letter]
    }
}' some_app.log
With this in mind, create a program to print a report like this from
some_app.log:
Successful Logins:
User446 - 1
User123 - 2
User113 - 1
User456 - 1

Successful Logouts:
User446 - 1
User123 - 2
User113 - 1
User456 - 1
View Answer
awk -F, '{
    if ($3 == "success" && $2 == "login") {
        successful_logins[$1]++;
    }
    else if ($3 == "success" && $2 == "logout") {
        successful_logouts[$1]++;
    }
}

END {
    print "Successful Logins:";
    for (user in successful_logins) {
        print user, "-", successful_logins[user];
    }

    print "\nSuccessful Logouts:";
    for (user in successful_logouts) {
        print user, "-", successful_logouts[user];
    }
}' some_app.log
Big Idea
awk is neat-o!
"Line of text" as a primitive is a really great programming model!
Feline Query
cd into the queries folder. You will find 20 one-liner SQL queries to
prepare to format the queries, let's start by printing them into the shell as a
singular text stream.
Challenge: write a command to print all 20 queries into your shell.
View Answer
ls | xargs cat
#          ^^^ hence, "feline query" haha.. ha hehe      ehe
sed
Challenge: now that you can print your queries, pipe them into sed, and write a regex to
make them less ugly!
Note: on macOS, consider installing gnu-sed, especially if you're familiar with
sedsyntax fromvim. Otherwise,sed -Eon macOS is going to enable "extended regular expressions," which is going to feel more like regex from JavaScript or Python, where operators do not need to be escaped.If you do install GNU
sed, it'll be available asgsedafter installation.
View Answer
# For GNU / Linux & WSL
ls | xargs cat | sed  's/\(FROM\|WHERE\|ADD CONSTRAINT\|FOREIGN KEY\|GROUP BY\)/\n\1/g'

# For macOS (gsed)
ls | xargs cat | gsed 's/\(FROM\|WHERE\|ADD CONSTRAINT\|FOREIGN KEY\|GROUP BY\)/\n\1/g'

# For macOS using the default FreeBSD version of sed and extended regex syntax
ls | xargs cat | sed -E  's/(FROM|WHERE|ADD CONSTRAINT|FOREIGN KEY|GROUP BY)/\n\1/g'
Now that we're printing some healthier looking queries, let's run that regex
over all the files in our queries folder!
View Answer
# For GNU / Linux & WSL (no matter what, the regex is the same as before)
sed -i  's/\(FROM\|WHERE\|ADD CONSTRAINT\|FOREIGN KEY\|GROUP BY\)/\n\1/g' *.sql
Big Idea
(wait for it)
You can't do that in VS Code!
Suffix: vim, rg, and fd
In the repository for this website, I tried to apply these wonderful lessons to find all my references to tests:
grep -rni 'test' | wc -l
Perfect! Using Unix utils, gluing shell commands together, and answering my questions! However, much to my dismay, it took several seconds, pinned my CPU at 100%, and returned over 30,000 lines. Either I'm a really great tester or something is fishy.
Turns out that find and grep are not aware of git. So, if they are your
primitives for real-world shell work, you're going to have a rough time. Or,
at least, you'll live a life full of grep -v node_modules.
Instead, use ripgrep and
fd. They are not drop-in replacements for
grep and find, respectively, because their CLIs are quite different, but
they are modern re-imaginings of these tools, and for practical development work
they are indisputably better. With fd, my testing regimen is immediately less
impressive:
$ fd | grep test | wc -l
       8
Lots of talk about blog, though!
rg blog | head
README.md:Or, read my blog! [jackdevries.com/blog](https://jackdevries.com/blog)
schema.prisma:// blog app
app/routes/[sitemap.xml].tsx:        <loc>${BASE_URL}/blog</loc>
app/routes/post/$post.tsx:          <Link to="/blog">
app/routes/post/$post.tsx:            <p>See all blog posts</p>
app/services/post/getters.ts: * Get the MDX module of a blogpost given its slug
app/components/finalSection.tsx:          <Link className="block text-center" to="/blog">
app/components/header.tsx:  if (pathname === "/blog") {
app/components/header.tsx:      <Link className={linkStyles} to="/blog">
app/components/header.tsx:        {pathname.includes("post") ? "posts" : "blog"}
Then, see my post about vim + ripgrep for details, but you
only need to drop a few lines into your vim config to tell vim to use
ripgrep instead of grep:
if executable('rg')
    " If we have ripgrep on this machine, use it
    set grepprg=rg\ --vimgrep\ --no-heading\ --smart-case
    set grepformat=%f:%l:%c:%m,%f:%l:%m
endif
This creates a quite powerful development environment without any additional
config. Especially combined with vim goodies like :cdo, :bufdo, macros, etc.
All you need is ctags and you'd have fuzzy-file-find,
fuzzy text search, goto symbol definition, and goto references.
Turns out the old masters figured a lot of stuff out back in the 1970's, and as always there's plenty for us to learn!